Jekyll 1 - How to create persone site using Github Pages and Jekyll?
Github Pages can provide free static web pages hosting. Jekyll is a popular static site generator that integrates seamlessly with GitHub Pages. Here’s how you can set up and use Jekyll with GitHub Pages…
References:
https://docs.github.com/en/pages
https://jekyllrb.com/docs
https://pages.github.com/themes
Part 1 - Quick start of creating personal site.
- Create Github repository.
- Enable Github Pages by settings.
- Apply Jekyll theme. (optional)
- Visit personal site.
1. Create Github repository.
- Login github.com and create a repository with the following settings.
Repository Name: {Owner} / {username}.github.io
Public or private: Public
Add a README file: Checked
Add .gitignore template: Jekyll
2. Enable Github Pages by settings.
- Open the created repository.
- Click tab “Settings” > menu item “Pages”.
Source: Deply from a branch
Branch: Main / (root)
3. Apply Jekyll theme. (optional)
The step is optional. If you want to see how it is easy to quickly enable Jekyll theme, following the steps below.
- Create a “_config.yml” file in the root folder of the repository.
- Copy the code into the file and save it.
# _config.yml file.
remote_theme: pages-themes/hacker@v0.2.0
plugins:
- jekyll-remote-theme

title: my site title
description: my site description. - Click tab “Actions” > “All workflows”. One or two workflow is created automatically because of code repository changes detected by Github Actions.
- If the latest workflow runs as below, the deployment of your site is completed successfully.

4. Visit personal site.
Open https://{username}.github.io.
Part 2 - Set up local development and CI/CD environment.
In the real world, we normally need a local development environment which allows us to code, local debugging and testing. It doesn’t need deploy uncompleted work to remote website every time.
In this section, we will lead you step by step for how to set the local development using Microsoft Visual Studio within Windows system.
- Install Ruby+DevKit on Windows
- Install Jekyll
- Configure Jekyll Theme
- Build and run local site
- Q&A of common problems and errors
1. Install Ruby on Windows
- Download latest Ruby+DevKit package (my version is Ruby+Devkit 3.4.4-2 (x64)) from the site https://rubyinstaller.org/downloads/.
- Run installer and select all components.
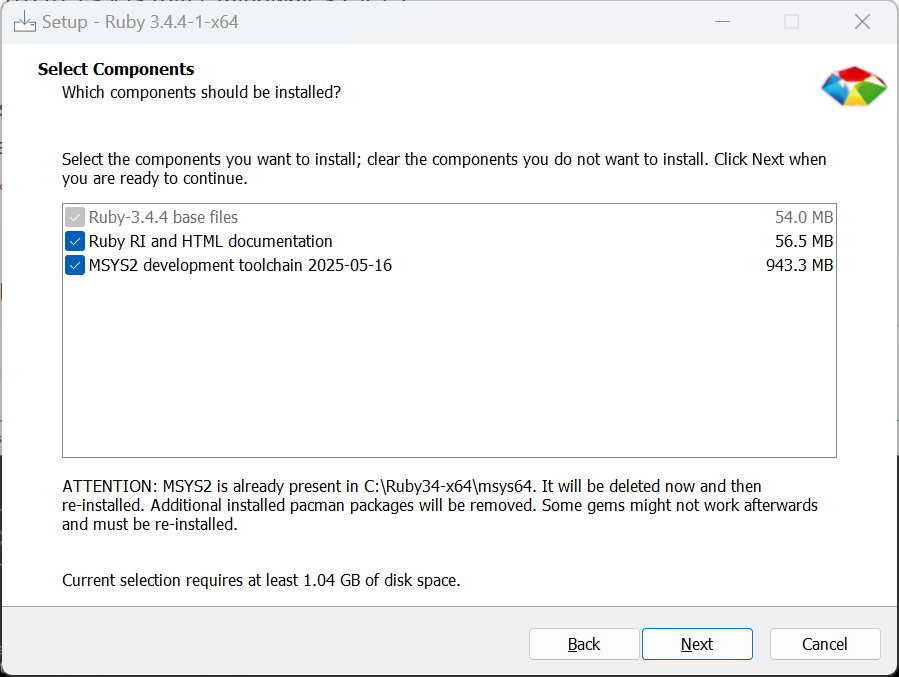
- At the last stage of installation, following the instructions to continue the installation in the pop-up command window.
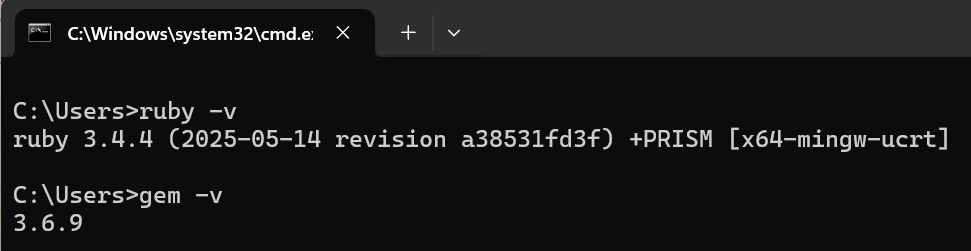
- Open a new command window, enter “ruby -v” and “gem -v” to verify.
- Installed ruby and gem versions will look like below if all is installed successfully.
2. Install Jekyll
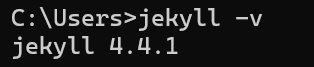
- Open a new command window. Run “gem install jekyll bundler”.
- Verify after installation completed by command “jekyll -v”.
3. Configure Jekyll Theme
- Go to local project root folder, for example “xxx.github.io”.
- Assume the “_config.yml” file is configured as below (following part 1 step 3).
# _config.yml file.
remote_theme: pages-themes/hacker@v0.2.0
plugins:
- jekyll-remote-theme

title: my site title
description: my site description. - Open a new command window. Navigate to root folder.
- Run “bundle init” command. “Gemfile” will be generated if it isn’t there.
- Open “Gemfile”. Add the following 3 lines and save it.
# Gemfile
gem "jekyll"
gem "jekyll-seo-tag"
gem "jekyll-remote-theme" - In the same command window, run “bundle install”.
- Listed packages in Gemfile will be installed.
Important tips:
- If there is any error for missing packages, put “gem {pakcage name}” in Gemfile and run “bundle install” again.
- For some region (like China), the default Ruby source site “https://rubygems.org” might not be accessible or instable. You need config an accessible mirror source site before run “bundle install”.
For exmple: in the same command window, run the command.# Change mirror Ruby source site.
C:\Users>bundle config mirror.https://rubygems.org https://gems.ruby-china.com
4. Build and run local site
- Keep at the root folder in command window.
- Run “jekyll build” to complie the site.
- Run “jekyll server” to run the site.
- Open browser to visit the local site (default: “http://localhost:4000”).
5. Q&A of common problems and errors
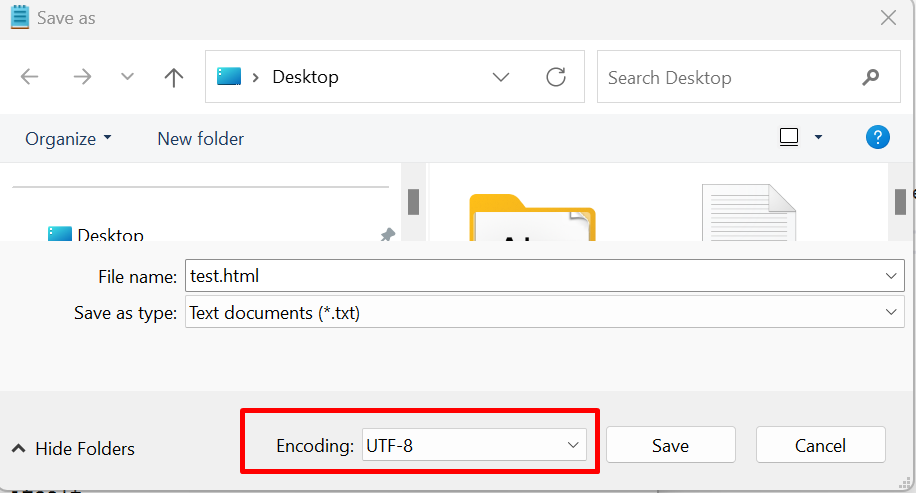
- Error: Liquid Exception: invalid byte sequence in UTF-8…
If UTF-8 is asked, source files must use UTF-8 encoding. To make it corrected,
In “Notepad”, “Save As” and select encoding as “UTF-8”.
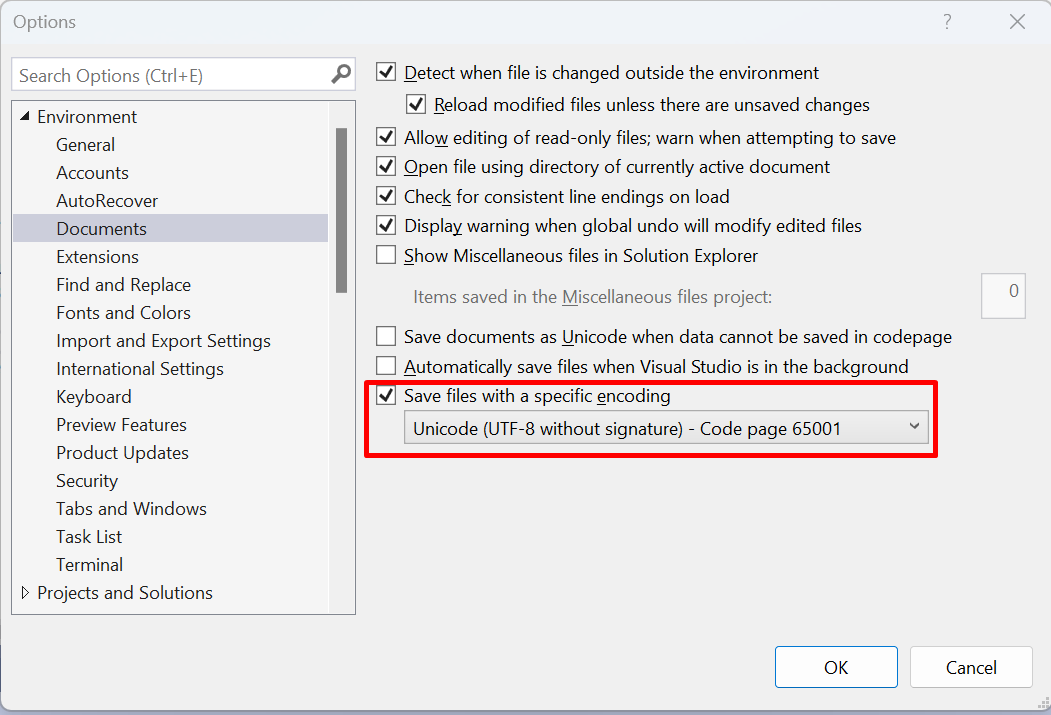
 In “Visual Studio”, change default environment setting by “Tools” > “Options” > “Environment” > “Documents”.
- Error: When run “jekyll build”, sometimes it says version incompatiblility error.
Run “bundle clean –force”. Then reinstall by “bundle install” command. - Tip: Change configured mirror Ruby source site.
Run command line.
# Change mirror Ruby source site.
C:\Users>bundle config mirror.https://rubygems.org https://gems.ruby-china.com - Error: You have already activated jekyll-sass-converter 3.1.0, but your Gemfile requires jekyll-sass-converter 3.0.0. Prepending
bundle execto your command may solve this. (Gem::LoadError).
After all methods tried, there is still error. Prepending “bundle exec” to the command. For example, use “bundle exec jekyll serve” to start the jekyll web service.# Add "bundle exec" befor command.
C:\Users>bundle exec jekyll serve